Easy Guide: How to Install Laminate Flooring
If you want to give your home a refresh without breaking the bank, then laminate flooring is an excellent option for you. It’s stylish and durable, and easier to install than many people think. At Perfect Restoration, we help homeowners beautifully transform their floors without emptying their wallets.
This complete guide teaches you how to install laminate flooring yourself with simple tools and easy-to-follow steps. Whether you are doing a whole home transformation or updating a single room, this guide will make your flooring installation easier and stress-free.
What is Laminate Flooring?
Laminate flooring is a synthetic floor covering that is meant to mimic real wood, stone, or other types of tile. It’s composed of several layers – a tough wear layer on top, a decorative image layer (to make it look like wood), a core layer (for strength), and a backing layer (for stabilization).
It’s one of the most popular floor coverings in today’s market because it’s cost-effective, scratch-resistant, and easy to clean. And the best part of laminate flooring is the fact that it can also be installed by you without the use of glue or nails.
Why Choose Laminate Flooring?
These are a few of the top reasons to select laminate flooring for your project:
- Simple Installation: Most laminate planks have a click-lock style that provides an easy installation with no glue.
- Affordable: Laminate will cost you less than real wood but fit your bill and appear just as pretty.
- Tough and Resilient: Laminate flooring provides a scratch and dent-resistant surface that also resists fading.
- Low Maintenance: Laminate floors only need regular sweeping or a light mop to keep clean.
- Many Designs Available: Laminate provides an endless supply of designs and finishes to appeal to every taste, function, and décor style.
At Perfect Restoration, we often recommend laminate flooring for use in homes where the homeowner wants a fresh, modern look, without the affordability of wood or tile.

Tools and Materials You’ll Need
Before starting, make sure you have these tools ready:
- Laminate flooring planks
- Underlayment (foam or felt)
- Measuring tape
- Pencil and rules
- Utility knife or saw
- Rubber mallet
- Spacers
- Tapping block
- Pull bar
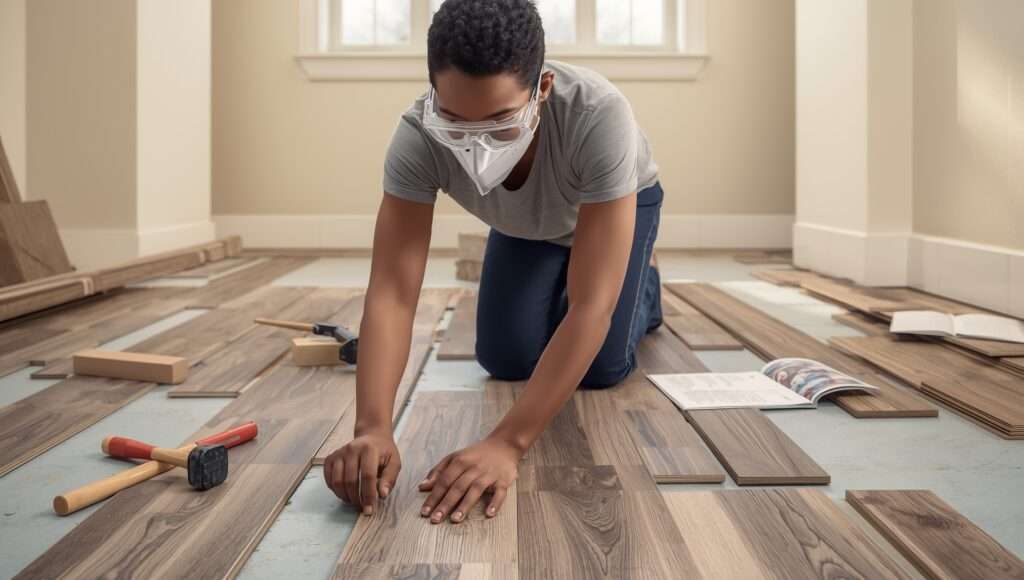
- Safety glasses
Having everything prepared will make your work faster and smoother.
Step-by-Step Installation Guide
Step 1: Prepare the Subfloor
Prior to laying your laminate flooring, you should check your subfloor. It should be:
- Clean: Ensure that you remove dust, debris, and leftover adhesive.
- Dry: Moisture may lead to damage to the laminate flooring.
- Level: Check if your surface is level; if not, a leveling compound should be used.
If your subfloor is concrete (like most!), a moisture barrier is a good idea before laying the underlayment.
Step 2: Let the Flooring Acclimate
Laminate flooring requires time to acclimate to the temperature and humidity in the room. It is important to store the sealed box in the designated room for at least two days (48 hours) before installation. This will help avoid expansion/contraction after the laminate planks are installed.
Step 3: Install the Underlayment
Underlayment provides another softer layer between the laminate flooring and the subfloor to help with noise reduction and provide cushioning underneath the laminate surface.
- Unroll the underlayment across the floor.
- Trim the side edges neatly with a utility knife, potentially leaving some underlayment behind to cover the baseboards precisely.
- Connect separate pieces of the underlayment with tape once you roll it out.
Confirm that the underlayment is flattened down without overlaps or wrinkles.
Step 4: Plan Your Layout
Before you start nailing your planks together, you should plan your layout first.
- Make an accurate measurement of the room.
- Decide which direction you want the planks to run. Most people prefer to lay the planks parallel to the longest wall or the main light source.
- Be careful not to have any small strips at the ends of rows; you can adjust the width of the first row if the first row is the correct width.
A well-planned layout will have your floor looking balanced and professional.
Step 5: Start Installing the First Row
Start from the left corner of the room and work your way right. Remember to put spacers between the planks and the wall to leave a ¼-inch gap for expansion. Lay the first plank (tongue side facing the wall). Attach the next plank by inserting the tongue into the groove at an angle, then push down to connect. Repeat until you finish the first row. If you have to cut the last plank to fit, use a saw to make a clean cut.
Step 6: Continue Laying the Next Rows
For the second row, you can begin with a plank that has been cut in half to stagger the joints, which will result in a more natural look and give a stronger structure.
- Insert each plank’s tongue into the groove of the previous row, at a slight angle.
- Then press down until it makes the click sound.
- Use the tapping block and mallet to ensure the seams are tight and have no gaps.
- And remember to continuously check to see if everything is aligned along the way. Always leave a small expansion gap along all walls.
- Step 7 is fitting around obstacles, if you need to install flooring around door frames, pipes, or corners
- You will need to trace the shape onto your plank, cut out the shape with a jigsaw or handsaw.
- Remember to retain the expansion space.
If you have laminate adjacent to other types of flooring, such as tile or carpeting, you will need transition strips.
Step 8: Install the Last Row
The last row typically requires some trimming to fit properly. So, measure the area, cut the boards, and use the pull bar to ensure they fit snugly in place. Once that is done, remove the spacers and make sure that none of the boards are loose or misaligned.
Step 9: Finishing Touches
To complete your lovely new floor:
Put the baseboards or molding to cover the expansion gap, clean the floor with a dry cloth or slightly damp cloth, do NOT wet mop for at least 48 hours.
Now sit back and enjoy your brand new laminate floor!
Maintenance Tips for Long-Lasting Floors
If you follow a couple of simple steps, laminate floors are easy to maintain:
- You should sweep or vacuum regularly to limit the buildup of dust.
- You should clean your spills right away to lessen the chance of stains.
- Use felt pads on furniture legs to lessen scratches.
- You should avoid harsh cleaners and excessive water.
If you take care of them, laminate flooring should last for 15-25 years or more.
When to Call the Experts
Though laminate flooring is excellent for do-it-yourself projects, hiring professionals will get perfect results when working with large or complex spaces.
At Perfect Restoration, the team offers installation services that are expert, worry-free free and guaranteed to look beautiful and be precise, and last.
We do everything – from prepping the floor to finishing it – so you can enjoy the process.
If you need help choosing laminate, have subfloor repair questions, inquiries about professional installation, or want a simple and affordable experience with certified professionals, you will want to reach out to Perfect Restoration for a fluid and easy experience.
Final Thoughts
Putting in laminate flooring is a great way to update your house and increase its value. Once you have put in a little preparation and gathered the necessary tools, you can follow this guide to achieve amazing results.
Of course, if you prefer a flawless installation done for you with no stress, we here at Perfect Restoration are here for you.
We strive to add quality, comfort, and beauty to each home we service.
Your floor of your dreams is only one phone call away- let’s get started!

FAQs
1. How long does it take to install laminate flooring?
Most rooms will take one to two days, based on room size and preparation.
2. Can I install laminate over carpet?
No, you cannot install laminate flooring over carpet. The carpet must be removed, and the subfloor must be even and clean beforehand.
3. Do I need glue or nails for laminate?
The majority of today’s laminate planks use a click-lock system, which does not require glue or nails. This makes installation much easier.
4. Can I mop laminate floors?
You can use a damp (not wet) mop or microfiber cloth on the floor. You do not want to soak any area because the laminate will soak up the moisture, possibly damaging the laminate planks.
5. Why should I hire Perfect Restoration to install my flooring?
Perfect Restoration will install your flooring professionally, provide valuable advice, and produce quality work, saving you time and ensuring you will love your new floor for years.

