
How to Install Metal Roofing Step-by-Step (Complete Guide)
Installing metal roofing is one of the smartest home improvement projects you can undertake. Known for its durability, low maintenance, and modern aesthetic, a metal roof can last decades longer than traditional shingles. Whether you’re a homeowner tackling a DIY project or a professional roofer seeking a refresher, understanding how to install metal roofing properly ensures your roof stands the test of time — and weather.
In this comprehensive guide, we’ll walk you through every step, from preparation and tools to installation and finishing touches. By the end, you’ll have the knowledge to confidently handle your own roofing project.
What Is Metal Roofing and Why It’s a Great Choice
Before learning the installation process, let’s explore why so many homeowners are switching to metal roofing.
Exceptional Durability and Weather Resistance
Metal roofs can last 40–70 years, often outliving the house itself. They are resistant to cracking, shrinking, and erosion. They can withstand heavy snow, rain, high winds, and even fire — making them ideal for all climates.
Energy Efficiency and Cost Savings
Metal roofing reflects sunlight rather than absorbing it. This reflective property can cut cooling costs by up to 25%, especially in hot regions. When combined with proper insulation, it helps regulate indoor temperatures year-round.
Low Maintenance and Eco-Friendliness
Unlike asphalt shingles that require frequent replacement, metal roofing needs minimal maintenance. It’s also eco-friendly since most panels are made of recycled materials and are 100% recyclable at the end of their life.
Tools and Materials You’ll Need
Having the right equipment makes installation faster and safer. Gather the following tools and materials before starting:
Tools:
- Safety harness and gloves
- Ladder and scaffolding
- Chalk line and measuring tape
- Power drill with screw bits
- Tin snips or electric metal shears
- Caulking gun
- Hammer and pry bar
Materials:
- Metal roofing panels (steel, aluminum, or copper)
- Metal screws with neoprene washers
- Roofing underlayment or felt
- Ridge caps, flashing, and trim pieces
- Foam closure strips
- Sealant or roofing caulk
Step 1: Prepare Your Roof Deck
Preparation is key to a long-lasting roof. Start by removing all old roofing materials — shingles, nails, and underlayment. Inspect the roof decking beneath; replace any rotted or weakened boards.
Next, install a roofing underlayment (felt or synthetic). This layer provides additional moisture protection. Begin at the bottom edge of the roof and work upward, overlapping each strip by at least six inches. Secure it with roofing nails or staples.
If your area experiences snow or ice, consider adding an ice and water shield along the eaves for extra protection.
Step 2: Measure and Cut the Metal Panels
Measure your roof’s dimensions accurately, accounting for overhangs. Mark your measurements on the metal panels using a chalk line. Cut the panels to length using tin snips or a power shear.
Make sure all panels are uniform before you start installation. Stack them neatly to avoid scratching or bending.
Step 3: Install Eave Trim and Flashing
Before installing the main panels, attach eave trim along the lower edges of your roof. This directs rainwater into the gutters and provides a clean edge.
Secure the trim with screws spaced about every 12 inches. Apply a thin bead of sealant along the top edge to prevent leaks.
Next, install valley flashing (if applicable) where two roof sections meet. This is a critical waterproofing element that prevents water from pooling or seeping through the joints.
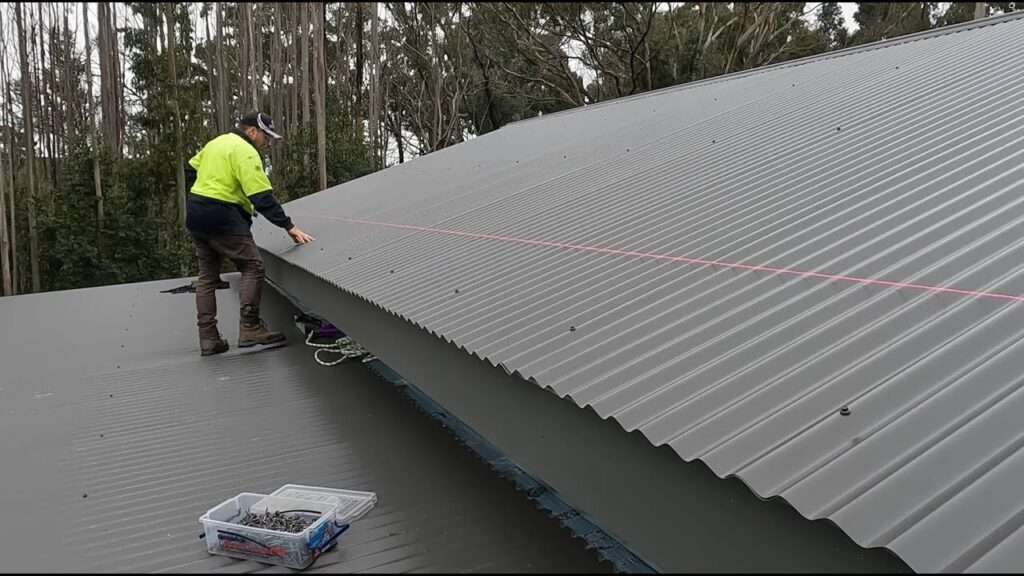
Step 4: Laying the Metal Panels
Start at the bottom corner of the roof, aligning the first panel square with the eave and ridge. The panel should extend about 1 inch past the edge for runoff.
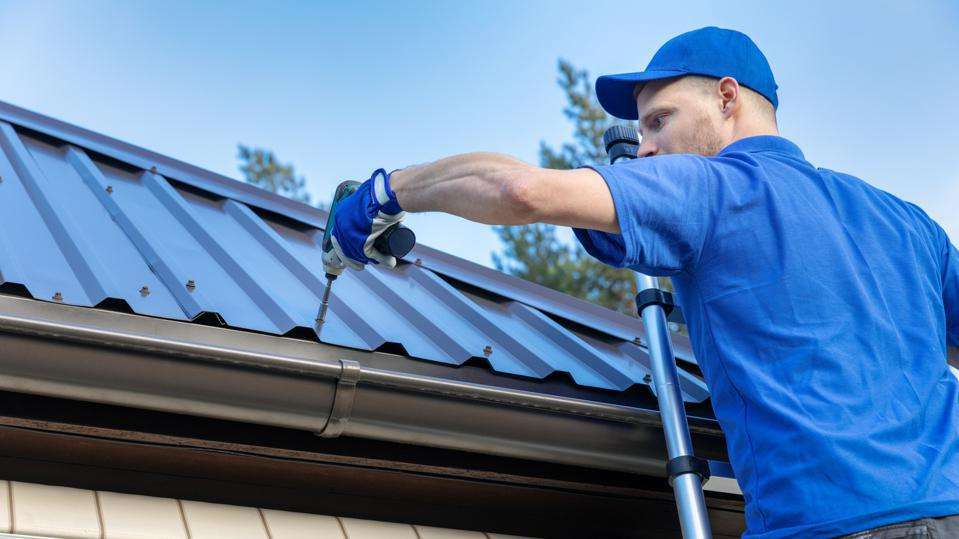
Use roofing screws with rubber washers to secure the panel. Drive screws straight and snug — not overly tight, which could damage the washer. Place them in the flat portion of the panel, spaced 12–18 inches apart horizontally and vertically.
Overlap each new panel by at least one ridge. Continue working across the roof, ensuring all seams line up straight.
Step 5: Installing Ridge Caps and Flashing
Once the main panels are in place, it’s time to install ridge caps along the roof peak. Place foam closure strips underneath the ridge caps to seal any gaps and prevent water or insects from entering.
Secure the ridge caps using the same screws and sealant. Also, install flashing around chimneys, skylights, and vents to ensure the entire roof is watertight.
Apply a continuous bead of sealant under the flashing edges for maximum protection against leaks.
Step 6: Finishing Touches and Inspection
Once installation is complete, do a full inspection. Check for:
- Loose or missing screws
- Gaps between panels
- Proper alignment of trims and flashing
Clean off any metal shavings or debris, as these can cause rust over time.
To maintain your roof, perform annual checks — especially after severe weather. Tighten any loose screws and reapply sealant if necessary.
Safety Tips When Installing Metal Roofing
- Always use a safety harness and stable ladder.
- Avoid walking on panels unnecessarily — they can become slippery.
- Work in dry conditions to prevent falls.
- Wear gloves and goggles when cutting metal.
Safety should always be your top priority.
Cost Considerations
The cost of installing a metal roof varies depending on material and labor. On average, you can expect to spend:
- DIY Installation: $3 – $6 per square foot
- Professional Installation: $8 – $14 per square foot
Although the upfront cost is higher than asphalt shingles, the long-term savings from energy efficiency and minimal maintenance make metal roofing an excellent investment.
Frequently Asked Questions (FAQs)
Can I install metal roofing over shingles?
Yes, in many cases you can install metal roofing over existing shingles. However, it’s crucial to check your local building codes and ensure the roof structure can handle the additional weight. An underlayment or furring strips may be required to prevent moisture buildup.
What’s the best type of metal for roofing?
Steel and aluminum are the most popular options. Steel is strong and affordable, while aluminum resists rust and works best in coastal areas. Copper and zinc are premium choices that offer stunning aesthetics and incredible longevity.
How long does metal roofing last?
A properly installed metal roof can last 40 to 70 years, depending on the material and maintenance. Some high-end options like copper can last over 100 years.
Do metal roofs make homes hotter?
No. In fact, metal roofs reflect heat, keeping your home cooler in summer. You can enhance energy efficiency with reflective coatings and proper insulation.
Can I walk on a metal roof?
Yes, but carefully. Always step on the flat areas of the panels and avoid the raised seams. Wear soft-soled shoes to prevent scratches or dents.
Are metal roofs noisy during rain?
This is a common myth. When installed with proper insulation and underlayment, metal roofs are no noisier than other roofing materials.
Final Thoughts
Learning how to install metal roofing is a rewarding project that offers long-term benefits. With the right tools, materials, and guidance, you can create a roof that’s durable, beautiful, and energy-efficient. Take your time with measurements, secure every seam properly, and prioritize safety at every step.
Whether you DIY or hire a professional, a properly installed metal roof will protect your home for decades — while giving it a sleek, modern look.